

Garden game changer...how I transformed my garden from grey and grotty to gorgeous and green on a budget
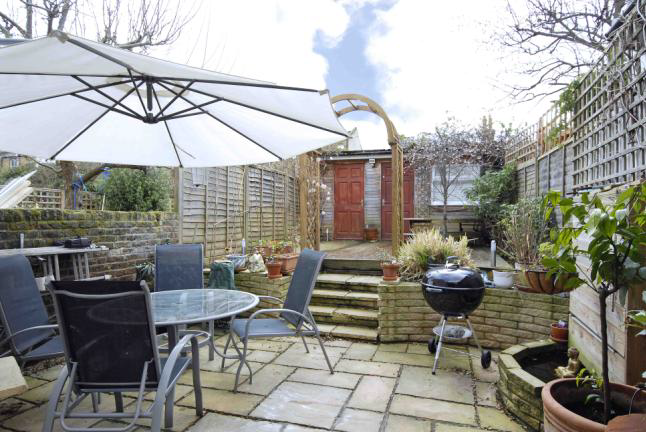
Our old house had a 25m long garden and when we bought this house I kidded myself that it didn't matter that we didn't have any actual garden because we were surrounded by parks and green spaces. And at least I wouldn't have to worry about mowing it once a week! But you know what? Sometimes you can't be bothered to trek up the hill to the park and you just want to open the door and let the little monkeys loose in a safe, contained space while you prep dinner/zone out/drink gin. Sadly, it quickly became apparent that this wasn't an option in this house because the "garden" was actually quite treacherous with rotten decking ready to collapse under the feet of little legs at any moment. And the paving/rotten decking combo also pretty much ruled out slides, swings, paddling pools etc. So it was a bit rubbish for the kids. Below is the estate agents photograph of the garden from the Right Move listing. As you can see it was a pretty grey, grotty and uninspiring place for grown-ups as well, and truth be told we didn't spend hardly any time in here for the first two summers. But that's all changed now! This post is all about how we got rid of the grot (and the rot) and gained a green space that we can't get enough of. Oh, and we saved thousands of pounds by doing it ourselves. Leaving me with plenty of money to spend on other things! And trust me if we can do it, anybody can!
WARNING - This post contains topless photos of my husband. Apologies in advance if you're easily put off by that kind of thing but it was a very hot day and he was working very hard!
So the offending decking was on the upper level, leading to a large shed/home office, which I'd eventually like to knock down but for the moment is the perfect place for us to store loads of our rubbish while we continue our renovations. The garden transformation all started last year when the fence running down the left side of the garden got ripped off the wall in a bad storm and we had no other choice but to get it replaced with a lovely new one (High five to that storm!). And of course once the lovely new fence was in it just made everything else look even worse. So I bought some Cuprinol Garden Shades paint and slapped it on the shed. I would totally recommend that by the way, it goes on so easily and has weathered really well too. And no I'm not being paid to say that. I really think it's great stuff. Oh and it comes in loads of colours. Anyway, things were looking up for the garden. Not much but it was a start, and as it was getting towards the end of Summer we decided to leave it at that...
By Spring this year though...uh oh! The decking had actually collapsed in places and was so slippy that you took your life into your own hands just trying to get across to the shed for a spare chair. So one weekend as I was about to head off for my sister-in-law's hen do, I instructed David and his brother to get make themselves useful and get cracking with ripping that decking up. Because I'm good like that. Here he is, hard at work...
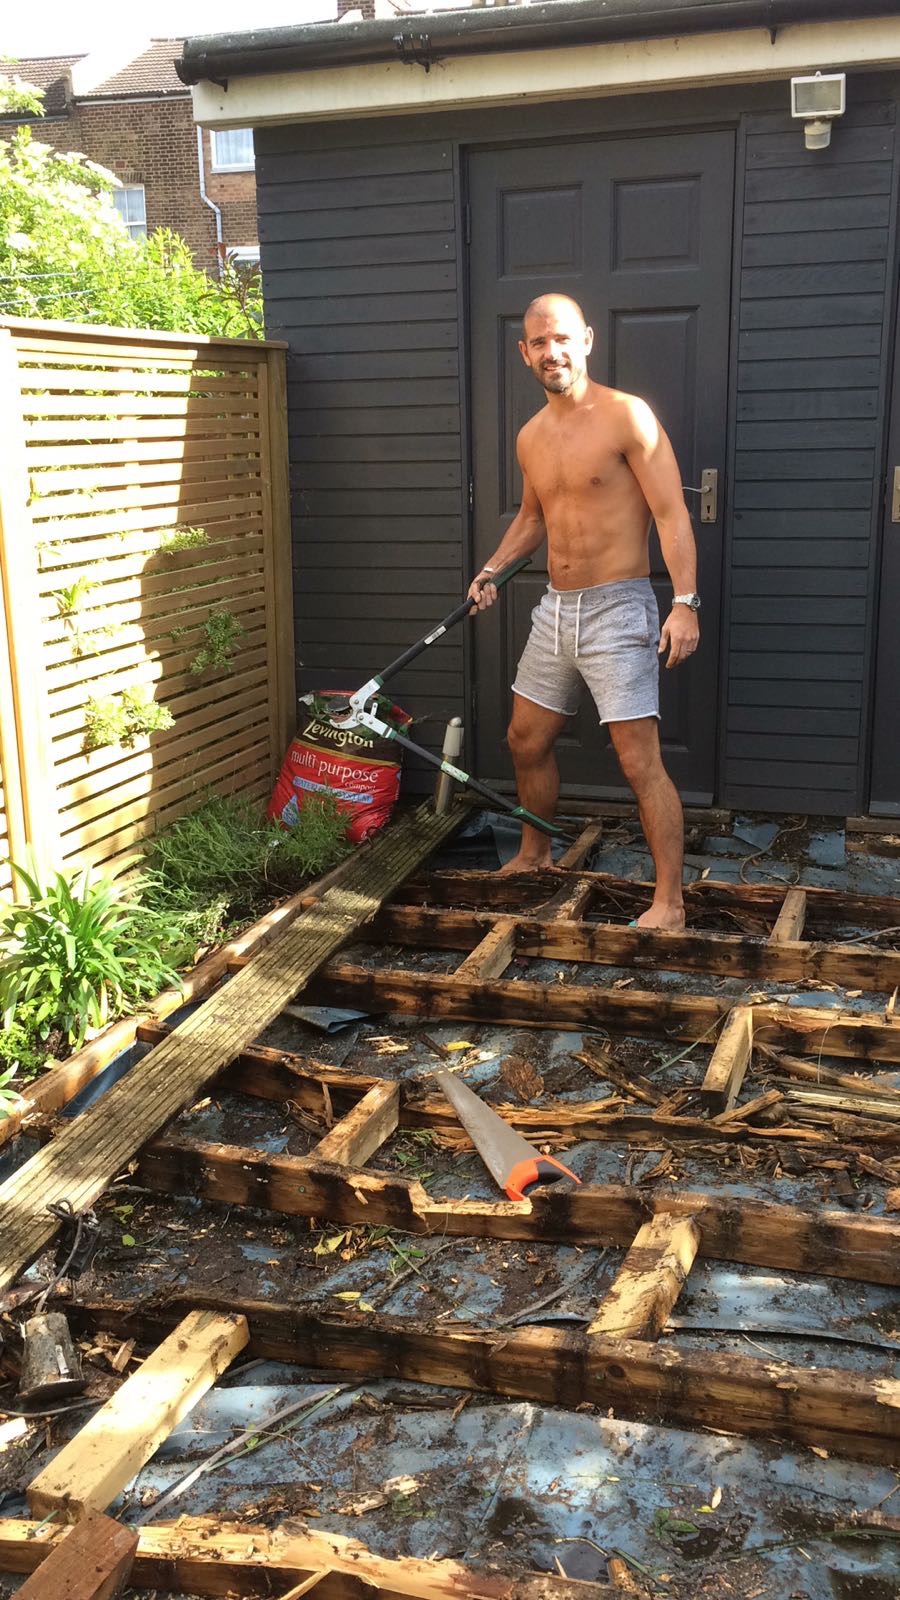
Yes, he is wearing flip flops to carry out this task. We Hurrell's are not the most practical of DIY'ers it has to be said. Nevertheless they did an excellent job. Though I have to say I got back from the hen do and freaked out a bit about what was going to happen next...we hadn't got that far in the thought process as I'd ordered the destruction of our garden on a bit of a whim, truth be told. I knew I wanted green but really didn't fancy laying real turf and adding another job to my long list of neglected household chores. So astroturf it was. A few people on our road had had their gardens done, along with a bit of landscaping so that seemed like the perfect option. And surely because we'd already cleared the decking it wouldn't cost that much, would it? WRONG! The quotes came in at between £3500 and £4k for new flower beds and a small square of astroturf. I was genuinely shocked. And there was no bloody way I was paying it. A quick look on good old B&Q threw up an easy-to-follow tutorial (again I'd really recommend checking these out if you're about to embark on any DIY) and that night I broke the news to David that his manual labour was not finished yet. I mean, it looked pretty easy...especially as I'd also enlisted my dad to help with replacing the flower beds.

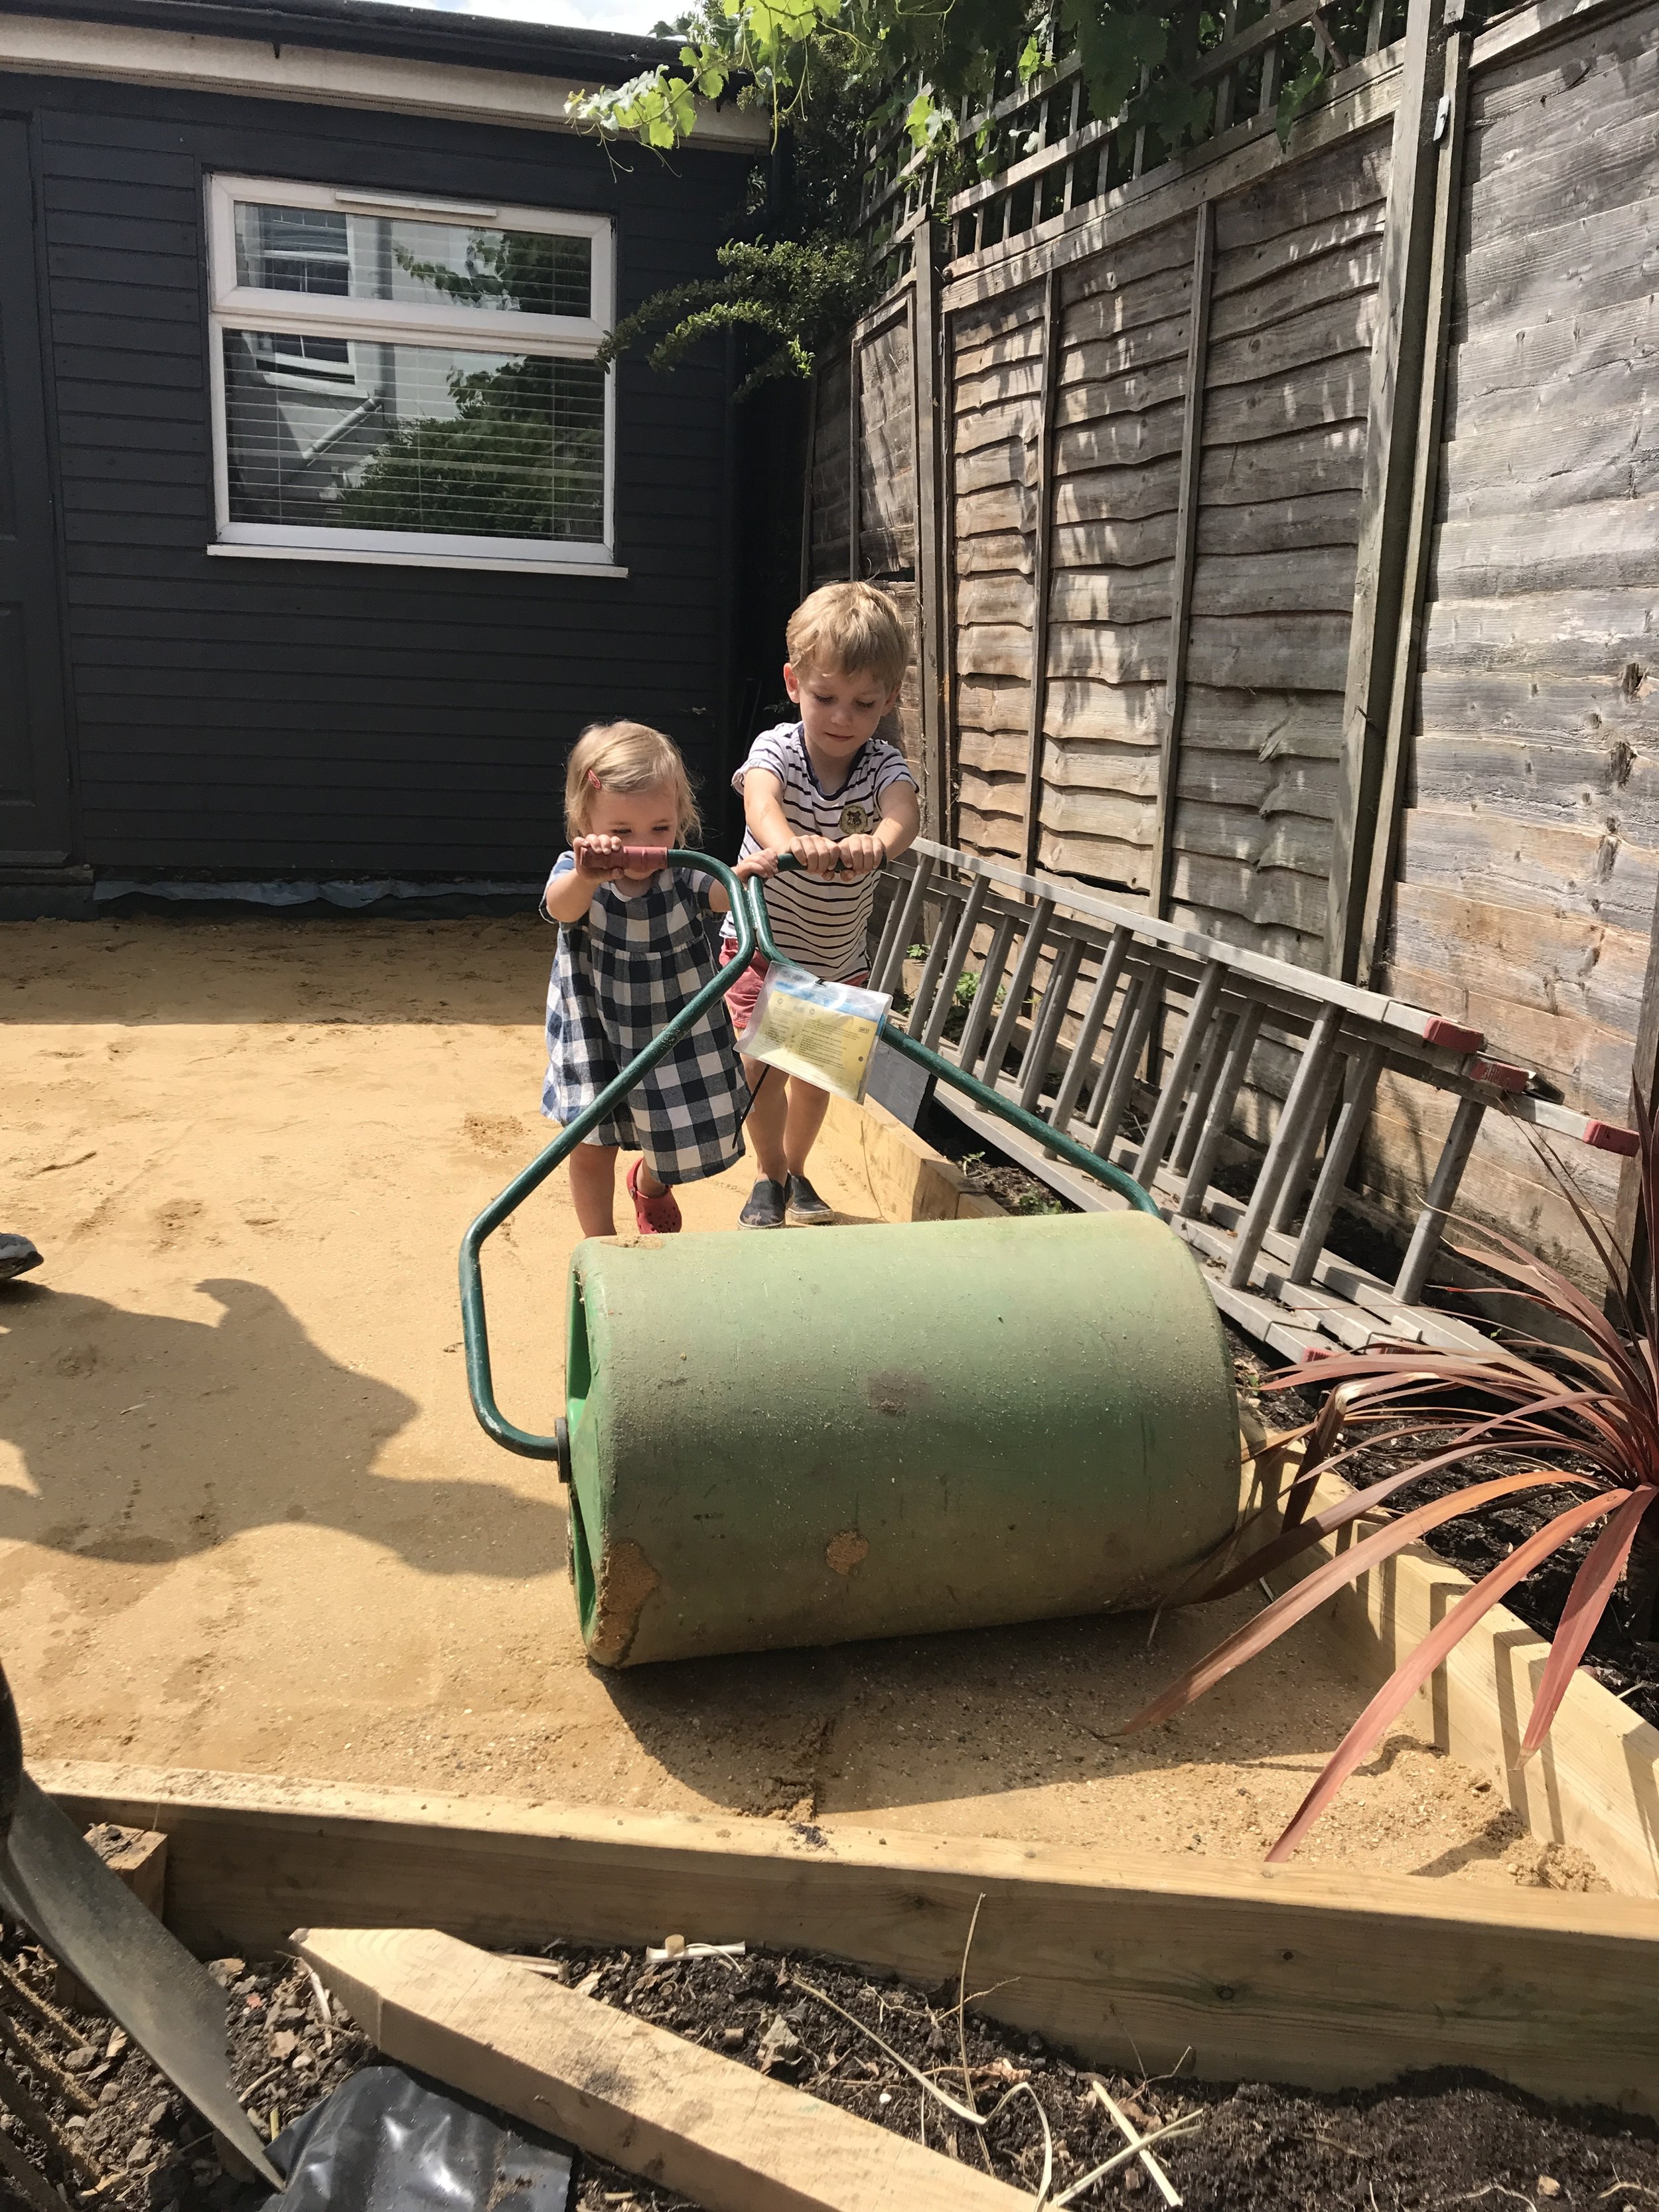
The beds were sorted within one morning at a cost of £44 for timber, a few glasses of his favourite lemon squash and a nice cold beer. Job done, he left us to it for the astroturf laying. I will say here that it pays to make friends with the ladies or gentlemen at your local Travis Perkins. I had read online that I needed to hire a compactor to level out the soil under the turf. But after explaining to one of the guys there what I was doing, he recommended I just hire a roller. £15 for the week. Boom! A roller also looked infinitely easier to manoeuvre than a compactor...what even is that?? *There are situations where a compactor might be necessary so speak to an expert to find out what is best.

Along with the astroturf, I had also ordered a tonne of sharp sand from trusty Travis Perkins to be delivered to my door. This helps with the drainage and went down on the existing soil, which had already been cleared of rocks, stones and anything else bumpy, with a rake.

We then used the roller to flatten and even everything out. More half-naked husband here...it was 36 degrees!

Top tip - get your kids involved in the manual labour. They think it's fun.
The next thing to go down was the membrane layer which stops weeds coming through the astro. This just came on a long roll and we cut strips to size before pinning it down with the U-shaped pegs.

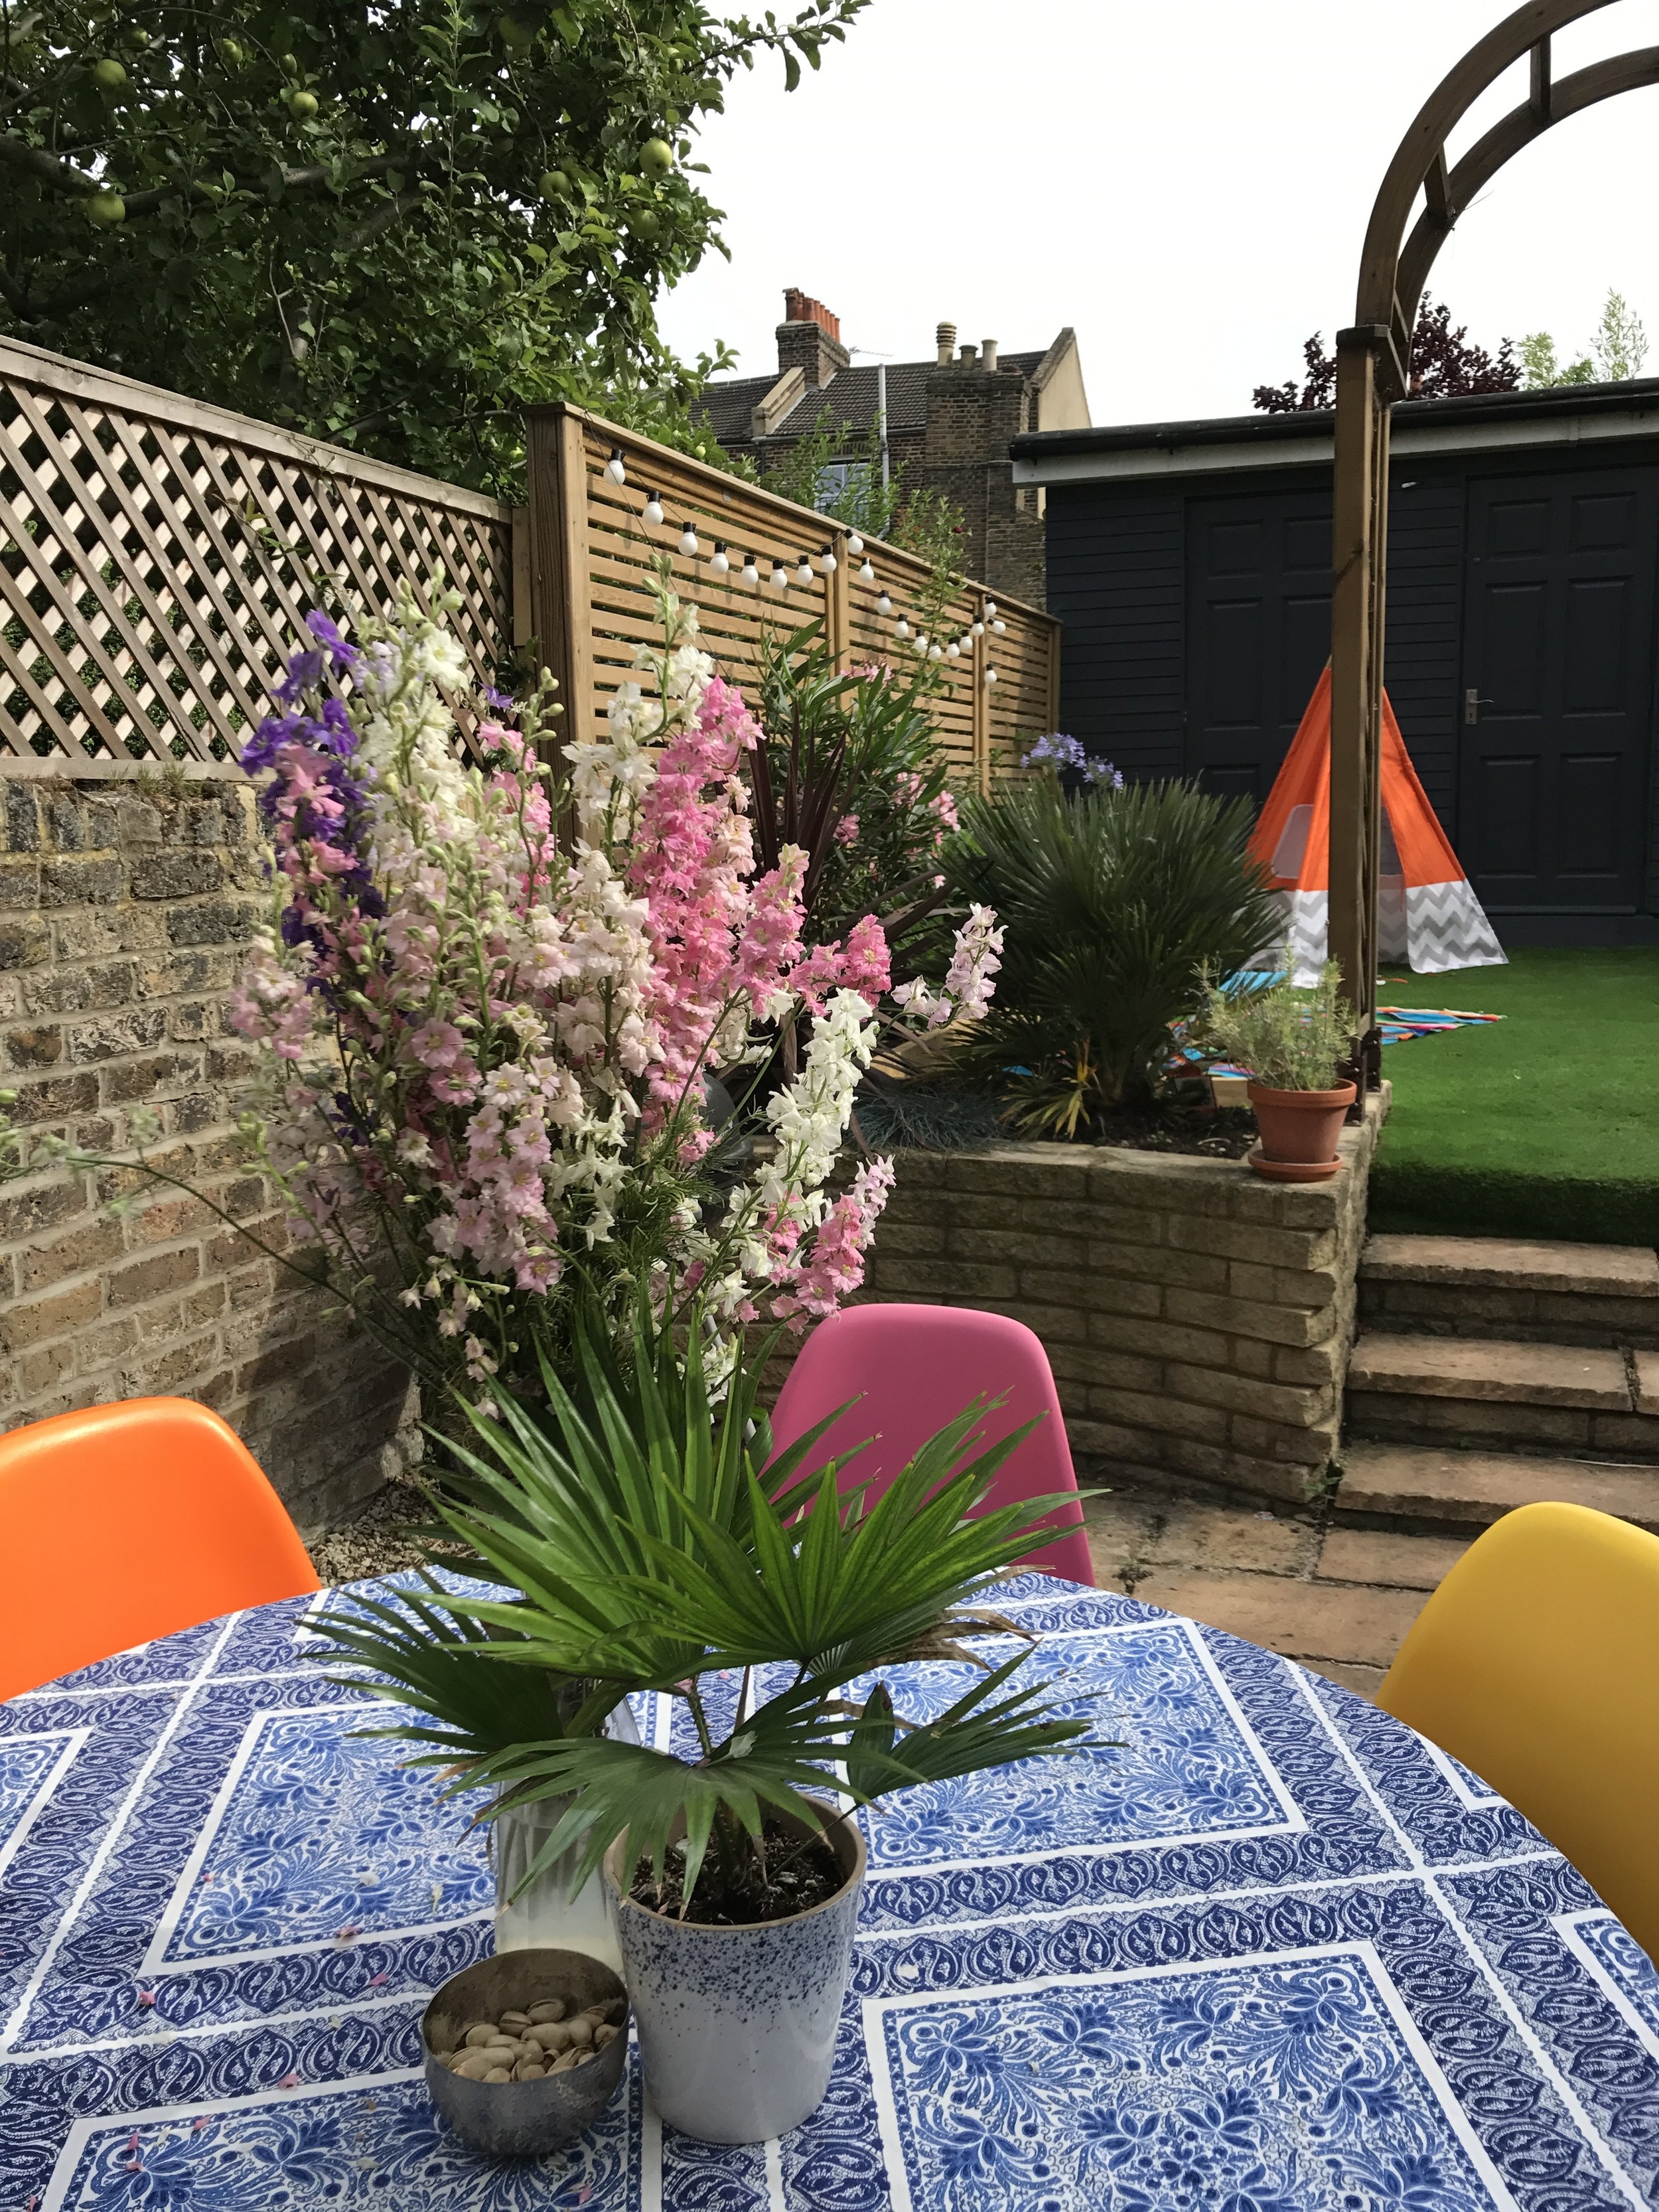
And finally the turf! I was too excited at this point and forgot to take a pic of it actually being rolled out, but we were lucky that the size of the area we needed to cover meant the turf came in one piece on a roll and we literally just rolled it out, cut it at the edges and pinned it down. I went for a premium quality turf from Luxigraze which has different colour fibres to make it look a bit more natural. I mean, let's face it, it's still a bit Teletubby, but I really don't care. I love it. It's green and has been a total game changer for all of us. Here's the finished article along with a very tired husband.

All of this came in at under £500 which I am delighted with given what we would have paid somebody else to do exactly the same job. Now, I was going to spend some of the money we saved on new garden furniture, because we don't actually have any apart from a disgusting table that the previous owner left behind. But, in what is fast becoming the story of my life, after spending weeks looking, I decided on a really cool table and six chairs from Ikea. Went online last week aaaaand...sold out! I've looked elsewhere but haven't managed to find anything else that fits the bill yet. So my next big idea is for us to have a go at building our own large L-shaped garden seating area. I'm not sure when we are going to have the time to do this though so watch this space! And in the meantime...
Festoon lighting, plant pot and nibbles bowl - Sainsbury's Home
...I remembered the set of colourful Eames style chairs I had gathering dust in the shed. So I've brought them out of retirement, chucked a tablecloth on the disgusting table and I'm making do for now until I can build or find a suitable replacement. It's know it's very bright, but it's such a lovely contrast from what was there before and it makes me smile. Since completing the transformation we have been out in the garden pretty much every chance we've had. And we've got a paddling pool and a slide. Life. Made.

What do you think of our DIY garden project? Have you done anything similar? I'd love to hear about it!
J x


